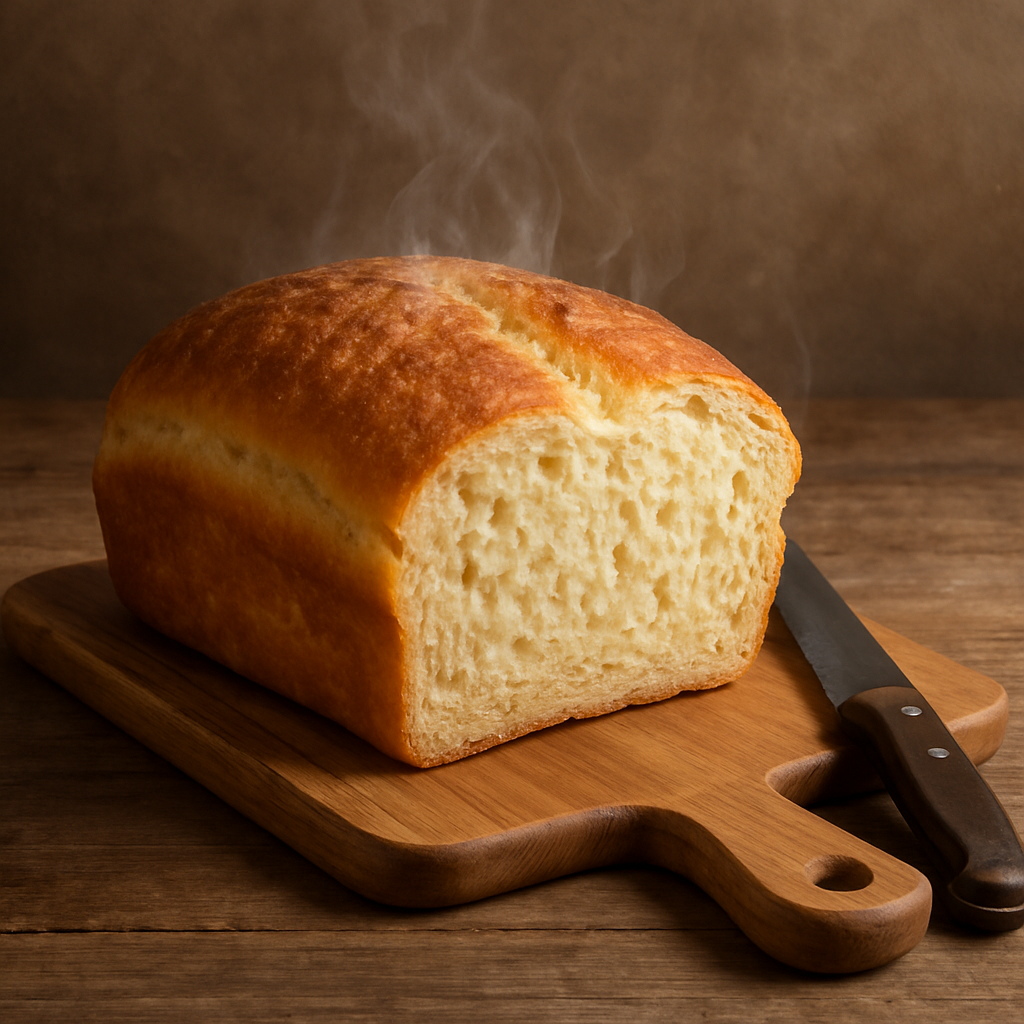
If you’ve ever dreamed of baking soft, airy bread at home—without fancy equipment or complicated techniques—this homemade fluffy bread recipe is for you. Perfect for beginners and seasoned bakers alike, this recipe is designed to be approachable, economical, and ideal for daily use. Whether you’re making sandwiches, toast, or just enjoying a slice with butter, this bread will become a staple in your kitchen.
📌 Table of Contents
- Introduction
- Ingredients and Their Functions
- Step-by-Step Instructions
- The Science Behind Fluffy Bread
- Ingredient Substitutions
- Recipe Variations
- Common Mistakes and Troubleshooting
- Storage and Shelf Life
- Serving Ideas
- Nutritional Information
- Frequently Asked Questions (FAQs)
- Final Thoughts
🌟 Why This Recipe Works
This recipe is built on the balance of a few simple ingredients that, when treated with care, produce incredibly soft, fluffy bread. Using active dry yeast, the dough rises naturally, creating air pockets that make the bread light and tender. The oil adds softness, while the kneading process develops gluten to give the bread structure.
🛒 Ingredients and Their Purpose
| Ingredient | Quantity | Purpose |
|---|---|---|
| All-purpose flour | 3 cups (375g) | Provides structure through gluten formation |
| Active dry yeast | 1 packet (7g) | Leavens the bread, making it rise |
| Sugar | 1 tbsp (15g) | Feeds the yeast, adds a slight sweetness |
| Salt | 1 tsp (5g) | Enhances flavor and controls yeast activity |
| Warm water | 1 cup (240ml) | Activates yeast and hydrates the dough |
| Vegetable oil | 2 tbsp (30ml) | Adds moisture and softness |
| Melted butter (optional) | 1 tbsp (15g) | Adds flavor and a golden crust (optional) |
🔪 Step-by-Step Instructions
Step 1: Activate the Yeast
In a bowl, mix warm water and sugar. Sprinkle yeast over the top and let it rest for 10 minutes. It should become foamy—this confirms the yeast is alive and active.
Step 2: Mix the Dough
Combine the flour and salt in a large mixing bowl. Pour in the yeast mixture and oil. Stir until a shaggy dough forms.
Step 3: Knead the Dough
Transfer to a floured surface. Knead for 8-10 minutes until smooth and elastic. This develops gluten, which gives the bread structure.
Step 4: First Rise
Place the dough in a greased bowl. Cover with a clean towel or plastic wrap and let rise in a warm place for about 1 hour, or until doubled in size.
Step 5: Shape the Dough
Punch down the dough to release air. Shape it into a loaf and place it in a greased 9×5″ loaf pan.
Step 6: Second Rise
Cover again and let it rise for 30–45 minutes until it slightly rises above the pan’s edge.
Step 7: Bake
Preheat oven to 375°F (190°C). Bake for 25–30 minutes or until golden brown.
Step 8: Cool and Serve
Remove from the pan and cool on a rack. Brush with melted butter for a soft crust, if desired.
🧪 The Science Behind Fluffy Bread
- Gluten Development: Kneading creates gluten strands, which trap the carbon dioxide released by the yeast.
- Yeast Fermentation: Yeast feeds on sugar and produces gas, which inflates the dough.
- Proofing: Resting the dough allows gluten to relax and gas to accumulate, contributing to fluffiness.
🔄 Ingredient Substitutions
- Flour: Use bread flour for even more structure and rise. For whole wheat, substitute 1/3 of the flour and increase water slightly.
- Yeast: You can use instant yeast (same quantity). Skip the activation step and mix it directly into the flour.
- Oil: Use olive oil, canola oil, or melted butter.
- Water: Substitute milk for a richer texture and flavor.
🎨 Recipe Variations
- Honey Wheat Bread
- Use half whole wheat flour and replace sugar with honey.
- Herb and Garlic Bread
- Add 1 tsp dried herbs and 2 cloves minced garlic to the dough.
- Cheese Bread
- Fold in ½ cup shredded cheese before the second rise.
- Sweet Bread
- Add raisins, cinnamon, and a touch more sugar for a breakfast loaf.
❌ Common Mistakes to Avoid
| Mistake | Solution |
|---|---|
| Water too hot | Use a thermometer (110°F/43°C max) to avoid killing the yeast |
| Not kneading long enough | Knead until the dough is smooth and elastic |
| Overproofing the dough | Stick to the suggested rise times, or dough may collapse |
| Using expired yeast | Always check expiration dates before use |
| Cutting hot bread | Let it cool to avoid a gummy texture |
🧊 Storage & Shelf Life
- Room Temperature: Keep in a bread bag or airtight container for up to 3 days.
- Freezing: Wrap in plastic and foil. Freeze up to 3 months. Thaw overnight and toast or warm before eating.
🍽️ Serving Ideas
- Toast with Butter and Jam
- Avocado Toast with Poached Egg
- Classic Grilled Cheese
- French Toast
- Homemade Croutons
- Bread Pudding
📊 Nutritional Information (Per Slice – 12 slices per loaf)
| Nutrient | Amount |
|---|---|
| Calories | 140 kcal |
| Carbohydrates | 25 g |
| Protein | 4 g |
| Fat | 3.5 g |
| Sugar | 1 g |
| Fiber | 1 g |
| Sodium | 190 mg |
❓ Frequently Asked Questions
Q: Can I make this recipe without kneading?
A: You can use the no-knead method by letting the dough ferment in the refrigerator overnight. However, kneading improves structure and fluffiness.
Q: What if my dough isn’t rising?
A: Check if the yeast is active and the room temperature is warm enough (ideally 75–85°F).
Q: Can I make this in a bread machine?
A: Yes. Add ingredients to your bread machine in the recommended order and use the basic white bread cycle.
Q: Is it vegan?
A: Yes, if you skip the butter topping or use plant-based butter.
Q: How do I know when the bread is done?
A: Tap the bottom of the loaf; it should sound hollow. Or use a thermometer—internal temp should be about 190°F (88°C).
💬 Final Thoughts
Baking fluffy homemade bread doesn’t have to be complicated or time-consuming. With just a few pantry staples and a little patience, you can produce a loaf that’s soft, delicious, and perfect for any meal of the day. Plus, there’s a special kind of joy in baking your own bread—from kneading the dough to smelling it rise and enjoying the first warm slice.
Whether you’re a novice baker or simply looking for a dependable, everyday bread recipe, this one will not disappoint. Give it a try, experiment with flavors, and enjoy the comforting ritual of baking from scratch.